Applying Edge Banding
16 January 2014 | edgeband.co.uk
Using pre-glued edge banding tape to cover raw edges such as MDF, Plywood, Blockboard, Chipboard and other panel edges is quick, clean and easy. Follow the 5 simple steps below to apply your edge banding tape for great results - | 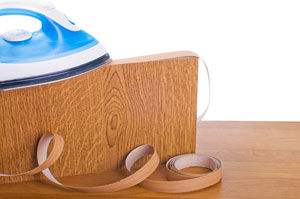 |
- Cut the edging tape to the length required, leave a little extra at each end. Place the edging so that it overhangs evenly on both sides of the board. If possible clamp the board in an upright position so that the iron can be used horizontally.
- Set the iron to a Medium heat setting. Move it slowly along the edging from one end to the other, apply some downward force as you move along. As the adhesive is melting you will see a small bead expand out from the underside of the edging tape.
- To ensure that the edging tape fully adheres to the board use a small block of wood and move it along the edging from one end to the other while still hot. Continue to apply pressure until the adhesive has cooled and hardened.
- Remove the excess edging tape from each end of the board with a Stanley blade. Trim the overhanging edge with an Edge Trimming Tool or Stanley blade.
- Remove sharp edges by lightly sanding with 120-grit sand paper.